I recently had to setup an Apple Push Notification service (APNs) server inside a Kubernetes cluster. The official documentation is somewhat hard to find and I found the process not to be that straightforward, especially when you spice it up a bit with some Kubernetes.
Given the ubiquitous need of apps to send notifications, I can only presume that most people rely of SaaS services such as Firebase.
Things we’ll talk about
APNs
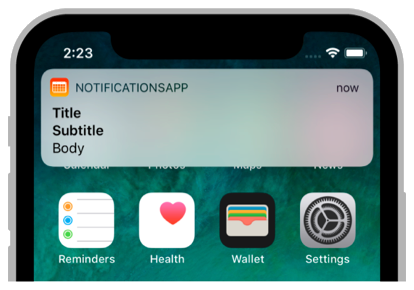
APNs is apple’s service to allow mobile application developers to push notifications to their users. I also discovered that notifications can be distributed silently (ie. without the user seeing a UI element); this can be useful when you want to send a message to your app from your server backend, to implement a kind of push for instance.
Upon first launch, your application will request a unique ID from APNs, this ID is bound to this app instance and this device.
You would usually store this on your server so that you can reach this client at a later point.
gorush
Since I wasn’t too keen on implementing this all by myself, and wasn’t too keen on paying a SaaS for this need either, I set out to find what’s readily available.
Enter gorush, is a neat little bit of software written in go which implements both Apple (APNs) and Google’s (FCM). Perfect fit!
The setup is fairly simple, all of the configuration is done by editing the provided YAML file.
Walkthrough
Getting a token from Apple
There are two ways to authenticate your provider with APNs, a token-based approach, and a certificate-based one.
The token base method seems much more practical to set up (and maintain, since it does not require renewal, can be used for any number of your apps), and my guess is that the certificate based one is mostly around for legacy support.
To get a token, go to your apple developer console and create a new key.
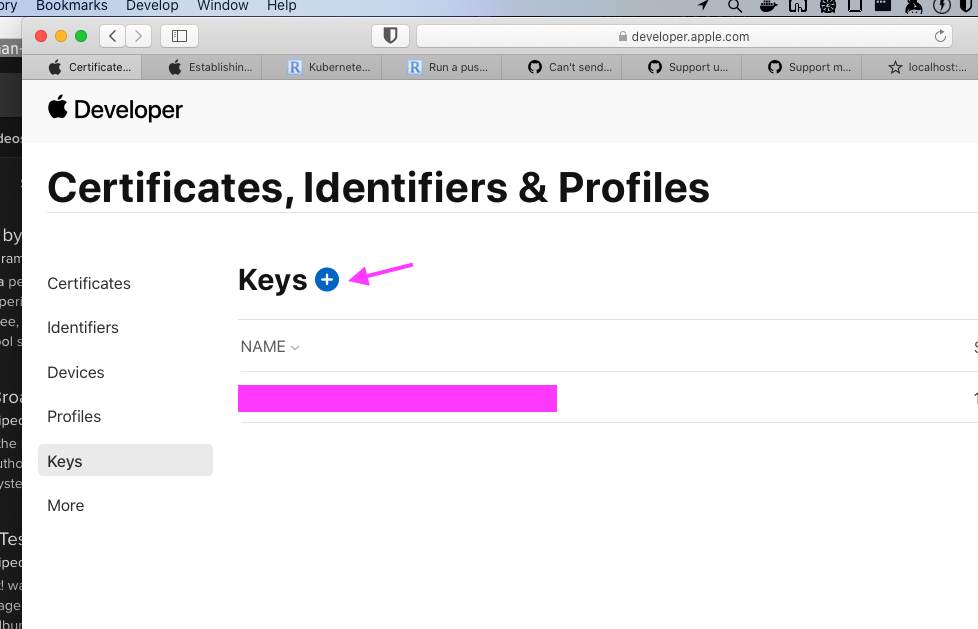
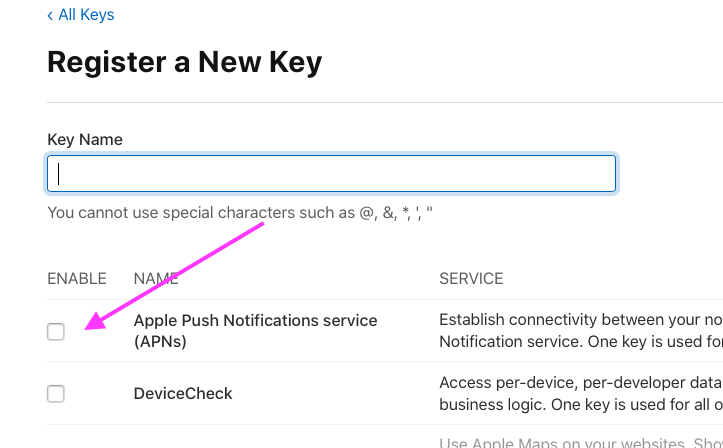
Once create you will be given the opportunity to download your token (iirc this can only be done at this point, you won’t be able to download it later).
The file should be something like Authkey_KEYID.p8, with KEYID being this
key’s ID (you will need that ID later on).
Store this somewhere safe, like in your password manager of choice.
Testing your token
gorush also ships with a command line utility which is very handy for debugging or just testing things out.
On macOS you can install it via Homebrew using:
brew install --HEAD https://github.com/appleboy/gorush/raw/master/HomebrewFormula/gorush.rbTo test that your token works, try the following:
gorush -ios -m 'hi' -team-id YOUR_IOS_TEAMID -key-id YOUR_KEYID -i AuthKey_XXXX.p8 -t AN_APNS_TOKEN --topic com.myapp.appReplace YOUR_IOS_TEAMID with your team ID (which can be found on your
developer console at the top right).
Replace YOUR_KEYID with the key id mentioned above.
Replace AN_APNS_TOKEN with a token you got from an actual device, I don’t
think simulators can generate token, but I’m not sure.
Replace com.myapp.app by your app’s bundle identifier.
Note: when running a development build you will be granted a development token, this is not important for token based authentication, but certificate-based authentication make a distinction between production and development tokens, each having their own certificate.
If you didn’t fuck anything up, you should now see a nice and pretty generic notification pop up on your device ! Congratulations 🎉.
Setting it up in Kubernetes
Deploying gorush
Gorush ships with some manifest files that make it easy to deploy on k8s, all the k8s related files are located under the directory of the same name in the gorush repo, over here.
First we’ll adjust some settings, edit the gorush-configmap.yaml to your liking and apply it (as above for the
namespace).
Note: gorush uses the Viper go module which allows to define runtime variables,
the configmap vaules will be used in the gorush-deployment file and set
as environment variables (the viper var stat.engine can be used as an
env with GORUSH_STAT_ENGINE); you can name your configmap entries
anything you want, but make sure you export the correct env var name.
A list of all settings can be found in gorush’s code by greping “viper”.
Here are my edits to the configmap:
apiVersion: v1
kind: ConfigMap
metadata:
  name: gorush-config
  namespace: gorush
data:
  # stat
  stat.engine: redis
  stat.redis.host: redis:6379
  ids.team: XXXXXX
  ids.key: XXXXXX
  ios.enabled: yep
  ios.key_path: /etc/secrets/authkey.p8
  ios.key_type: p8
And the corresponding edits in the gorush-deployment.yaml file:
- name: GORUSH_IOS_TEAM_ID
  valueFrom:
    configMapKeyRef:
      name: gorush-config
      key: ids.team
- name: GORUSH_IOS_KEY_ID
  valueFrom:
    configMapKeyRef:
      name: gorush-config
      key: ids.key
- name: GORUSH_IOS_ENABLED
  valueFrom:
    configMapKeyRef:
      name: gorush-config
      key: ios.enabled
- name: GORUSH_IOS_KEY_PATH
  valueFrom:
    configMapKeyRef:
      name: gorush-config
      key: ios.key_path
- name: GORUSH_IOS_KEY_TYPE
  valueFrom:
    configMapKeyRef:
      name: gorush-config
      key: ios.key_type
Storing your authKey in Kubernetes
Create a authkey-secret.yaml file with the following contents:
---
apiVersion: v1
kind: Secret
metadata:
name: ios-apns-auth-key
namespace: gorush
type: Opaque
stringData:
    ios-push-rsa-key: |
        -----BEGIN PRIVATE KEY-----
        MIGTAgXXXXXXXXXXXXXXXXXXXXXXXXXXXXXXXXXXXX
        ....
        -----END PRIVATE KEY-----
Replace the bit with BEGIN PRIVATE KEY with the contents of your AuthKey.p8
file and apply this manifest.
Edit the gorush-deployment.yaml file once again to mount this secret:
-- ...
spec:
  volumes:
  - name: ios-apns-auth-key
    secret: # <- this
      secretName: ios-apns-auth-key
  containers:
  - image: appleboy/gorush
    name: gorush
    imagePullPolicy: Always
    volumeMounts: # <- that
      - name: ios-apns-auth-key
        mountPath: /etc/secrets/
        readOnly: true
-- ...
Gorush service
If you only plan to use gorush within your cluster, eg. not exposed on the web
(which I suggest), make sure to edit the gorush-service.yaml file and set the
type to ClusterIP, this will make the service routeable only within the
cluster.
Apply everything!
$> kubectl apply -f k8s/gorush-namespace.yaml
$> kubectl apply -f k8s/gorush-configmap.yaml
$> kubectl apply -f k8s/gorush-redis-deployment.yaml
$> kubectl apply -f k8s/gorush-redis-service.yaml
$> kubectl apply -f k8s/gorush-deployment.yaml
$> kubectl apply -f k8s/gorush-service.yaml
Testing the setup
Spawn a temporary container to check that the server is setup correctly.
$> kubectl run tmp-shell --rm -i --tty -image alpine -- shInside the container install curl and test the endpoint!
$> apk add curl
$> curl gorush.gorush.svc.cluster.local
{"text":"Welcome to notification server."}
If you see a similar output, congrats once again, you’ve done it 🎉.
If you need to debug your config, you can dump it by curling
gorush.gorush.svc.cluster.local/api/config, also pretty handy.
Sending out a test notification
Run your temporary container once more, create a JSON file with the following content:
{
  "notifications": [
    {
      "tokens": ["AN_APNS_TOKEN"],
      "platform": 1, # 1 is for iOS
      // "production": true, #Only for production tokens
      "title": "Le title",
      "topic": "YOUR_APP_BUNDLE",
      "alert": {
        "body": "le body"
      }
    }
  ]
}
Then run:
$> curl -X POST --data @notification.json http://gorush.gorush.svc.cluster.local/api/pushAgain, congrats if you see a notification on your device ! 🎉
Happy notifying.